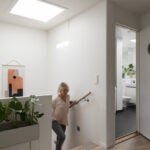
All too regularly after a bout of bad weather, heavy wind, and driving rain, we will get a flurry of calls asking us to attend site and investigate leaks and water ingress around VELUX roof light windows. The first question I’ll ask is, ‘where is the window situated?’, all too often the answer is the same, in the ground floor extension roof.
Having built rear extensions myself in the past, I understand the need to get the roof pitch just right so that it fits neatly against the existing building just under the first-floor windows. The struggle is in ensuring the roof is steep enough to allow for the roofing tiles and roof windows to work correctly. Often something must give, (especially if the extension protrudes 3m or so from the back wall) and it is usually the pitch of the roof that takes the hit by being built at a lowered angle (as no one really wants to lose floor space just for some pitch roof lights to be installed).
The problem is that VELUX roof windows have traditionally been designed to have a pitch of at least 15 degrees to work correctly. This is something that is either overlooked or disregarded until the problems ensue. VELUX have recently launched their new low-pitch roof window which is great news. However, after years of dealing with the problems caused by standard VELUX roof windows being installed in low pitched roofs, I have listed below some common problems with VELUX Windows to help identify the cause of the issue if your home has a low-pitch roof with pitch roof windows already installed in this handy collection of tabs below.
Common Problems with VELUX Windows
- Roof Pitch
- Poor Installation
- Blocked Side Channels
- Loose and Missing Flashings
- Missing or Poorly Installed Under Felt Collars
- Internal Condensation
Checking the roof pitch – this Is the first thing to do. This can be done by simply downloading the VELUX pitch finder app to your phone. Once downloaded, hold your phone against the internal frame of the VELUX window and check the degree.
All standard VELUX windows and flashing kits are designed to work in pitched roofs of 15 degrees and above, anything below this is a sure sign of trouble!
It’s also worth checking the roof covering. There are only a few roof tiles that are designed for such a low pitch with most common brands being suitable for 17.5 degrees and above. VELUX’s new low-pitched roof windows are perfectly designed for these occasions and are a product we strongly recommend to our customers with a lower pitch.
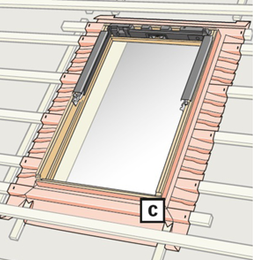
Note, the gaps between the tiles, the side and head of the window. These are there for a purpose, fitting the tiles too close to the window can have a detrimental effect to the water tightness of the installation. The general idea is that water has a free passage around the window and water is discouraged away from the glass unit. Water sitting on the external glass is a clear sign that the roof pitch is too low for the window specified.
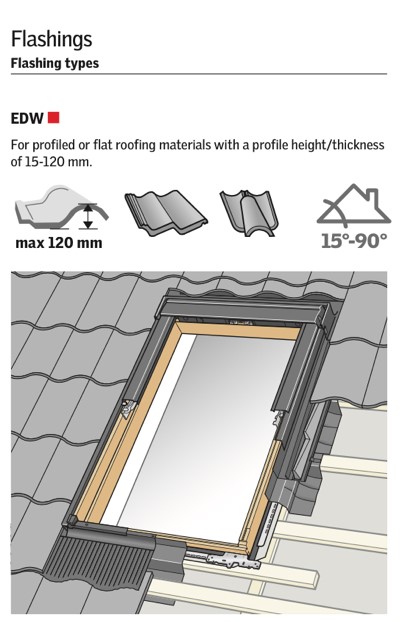
Misaligned flashing apron to tiles and excessive kinks in the lower flashing detail are common indications that suggest the window has not been installed to the manufacturer’s guidelines. They often require an 80mm gap from the top of the tile to the start of the window frame to allow the lower flashing to sit correctly and enable water to flow freely away from the window.
Windows installed incorrectly like this will encourage water build-up at the lowest part of the flashing which will often be horizontal, with some flashing parts sloping towards the building in a shallow pitched roof. An installation like this will undoubtedly leak, as VELUX window flashings are designed for rainwater to flow away from the window and down the roof, via channels at the side of the window.

If these channels are blocked or obstructed, the flashing design fails, allowing water to track in a different direction.
Water is hindered by the raised profile of the roof tile at the intersection at the bottom of the window or a very low-pitched roof. Water often gathers in a trough-like fashion and then follows the path of least resistance, which is under the tile behind the flashing.
If there are gaps and holes in the roof membrane or roof felt, then water can pass through onto the underside of the plasterboard ceiling causing water damage.
It’s worth checking that all the flashings are intact, and all the screws are tight. We see many cases where parts are missing, and screws are loose. A simple tightening of a screw can stop a leak. Obviously missing flashings will need to be replaced urgently to ensure water tightness.
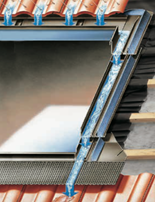
The second line of defense for the window in its fight against water ingress is the underfelt collar. They can either be made up on-site during installation of the roofing felt membrane or a special felt collar can be specified when ordering the window. This is called a BFX kit and comes with a transverse gutter, which is installed as standard with all our replacements and new installations.
This is often overlooked by installers, and they cut a hole in the roof relying on the external roofing material alone to keep water away from the window. This attitude is naive and very problematic, it only takes a few minutes to install the BFX kit, and once installed the roof is watertight even if the window flashing is not completely installed. For us, this is a great piece of mind, knowing we are not rushing to complete an install in case it might rain.
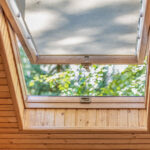
Setting out the internal trimming support is also key for a good finish. All too often we will go to site and find that the windows installed do not have a splayed reveal which leads to a buildup of condensation at the lower portion of the window. Over time this will cause a buildup of mildew at best and rot the window frame at worst. Admittedly, it is hard to create a great splay on low-pitched roofs, but an attempt should be made to disperse the hot air that is collected.
Tips and Helpful Advice for problems with VELUX Windows
If you are reading this because you have found yourself in the position where you have VELUX roof windows in a low-pitched roof that present the problems discussed above, then here are some thoughts and solutions that we have used in the past and would recommend as they have had good results.
- At a very minimum have the windows serviced regularly, we have clients that we visit both in the spring and autumn to service their windows to ensure they are in tiptop condition. As part of our maintenance package, we will ensure all the flashings are secure, clean and fit for purpose. It’s very much like an MOT for your car and is also part of the requirements to validate your 10-year product guarantee.
- Check that there is sufficient felt lapped up the side of the windows and install the BFX underfelt collars if necessary.
- Replace the existing windows with the new low-pitched VELUX windows, as long as the sizing works i.e., MK06 standard window for a MK06 low pitched version.
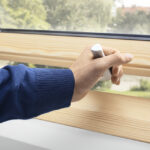
- If there is a buildup of condensation on the window, leave the vent bar in the trickle vent position, this will allow an airflow across the glass and allow hot air to disperse.
- You could also look at automating the windows if they are manual with a VELUX solar conversion kit. This kit will take a manual centre pivot window and turn it into a mechanically operated unit with no additional wiring needed. Once installed you could look at using the VELUX Active system to monitor air quality and temperature in the room. The system will automatically vent the windows if programmed to do so.
New Installations
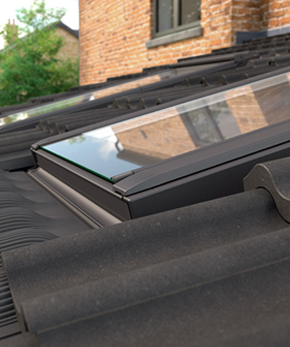
If you’re researching what new windows to purchase for a low-pitched roof, then GOOD NEWS! In September 2021, VELUX released a version of their window that is specifically for low-pitched tile roofs. The window performs well on roofs as low as 10 degrees. Having been involved in the installation of the prototypes, I can tell you that these windows are a great solution to the problems caused by installing standard windows on shallow roofs.
The designers at VELUX have overcome the main issue which is the collection of water at the bottom of the glass unit and bottom flashing apron.
The first innovation was to extend the glass and remove the lower glass casement, which was a problem area, and install a longer flashing apron allowing water to flow freely away from the installation. They were able to do this whilst keeping all the same levels of daylight and fresh air at the standard VELUX window.
A Final Important Note
Please remember to use low-pitched roof tiles! As I said earlier, there are only a few choices on the market that will go as low as 10 degrees in roof pitch. For the best results choose both low-pitched roof tiles and the new VELUX low-pitched room window. My team at VEL Fit look forward to working with you to specify and install your new roof windows and helping to transform your home!